Hi, welcome to funnelmoose.com and my illustrated step by step guide on how to integrate Constant Contact with ClickFunnels.
As Constant Contact offers you a one-month no credit card required free trial, why wouldn’t you want to try them out for your business?
Connecting your Click Funnels and Constant Contact accounts is a very simple process and should take less than two minutes to complete.
In this article, I’ll be going over:
- How to connect ClickFunnels and Constant Contact quick guide
- How to integrate Constant Contact with ClickFunnels illustrated guide
- Links to other how to integrate autoresponder with ClickFunnels articles
Table of Contents
What Do You Need?
You only need the following two things to complete Constant Contact integration with ClickFunnels:
- Constant Contact account.
- ClickFunnels account.

Got your accounts sorted? Let’s get to it.
How To Connect ClickFunnels And Constant Contact Quick Guide
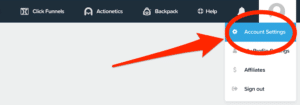
- Step 1: Log in to your ClickFunnels account and click on Account Settings in the top-right drop-down menu.
- Step 2: Click on Integrations, Add New Integration, and then click the Constant Contact logo.
- Step 3: Give your integration a nickname and then click Connect Integration.
- Step 4: Log in to our Constant Contact account when prompted and click on Allow when asked to allow ClickFunnels access to your Constant Contact account.
That’s the quick guide done and dusted, let’s go through that again in a little more detail with the illustrated guide.
How To Integrate Constant Contact with ClickFunnels Illustrated Guide
Step 1
Go to the ClickFunnels login page, sign in to your account, and click on Account Settings:
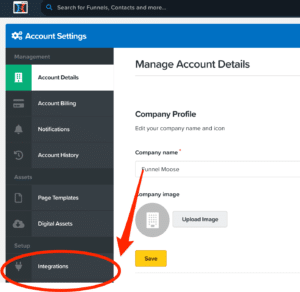
Step 2
Click on Integrations:
Step 3
Click on Add New Integration: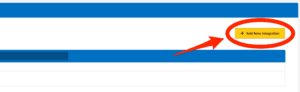
Step 4
Click on Constant Contact:
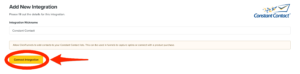
Step 5
Give your integration a nickname. For this example, I’ve called mine Constant Contact.
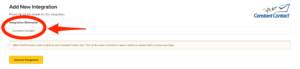
Click on Connect Integration:
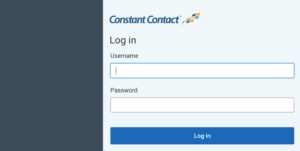
Step 6
You’ll now be redirected to the Constant Contact sign in page. Enter your username and password, then click log in:
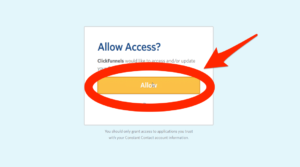
Click on Allow:
You have just completed the Constant Contact and ClickFunnels integration, you should be able to see a Constant Contact API was successfully created message in your ClickFunnels dashboard.
You can now capture your leads email addresses from your ClickFunnels landing pages and sales pages, and grow the size of your contact list.
Using Constant Contact with ClickFunnels will also allow you to add contacts to your Follow-Up Funnels contact lists should you be a ClickFunnels Platinum plan subscriber.
If you’d like to try alternatives to Constant Contact email marketing then check out my Top 10 Showdown – Best Email Autoresponder For ClickFunnels article.
How To Integrate Autoresponder With ClickFunnels Guides
For step-by-step guides on other autoresponders that you can integrate ClickFunnels with, the following articles may be of interest:
Integrate ActiveCampaign With ClickFunnels
How To Integrate AWeber With ClickFunnels
Integrate ConvertKit With ClickFunnels
How To Integrate GetResponse With ClickFunnels
How To Integrate MailChimp With ClickFunnels
Thank you for taking the time to read my how to integrate Constant Contact with ClickFunnels article, I hope you found it helpful and know which provider you’re now going to use for your ClickFunnels email service.
Disclaimer: I am an independent ClickFunnels Affiliate, not an employee. All views expressed on this blog are my own based on my own experience of using the ClickFunnels software. I use affiliate links on my blog and may earn a commission from any links you click on and make a purchase.